
Preparing the network resources in DFS
Begin the configuration by creating three folders on the selected network resource. The first folder to create is the folder where the configuration will be stored.
Monetrax will store the DEM-related files on a Windows server with the DFS service, to add a folder with the configuration, log in to the file server and run the DFS Managment attachment.
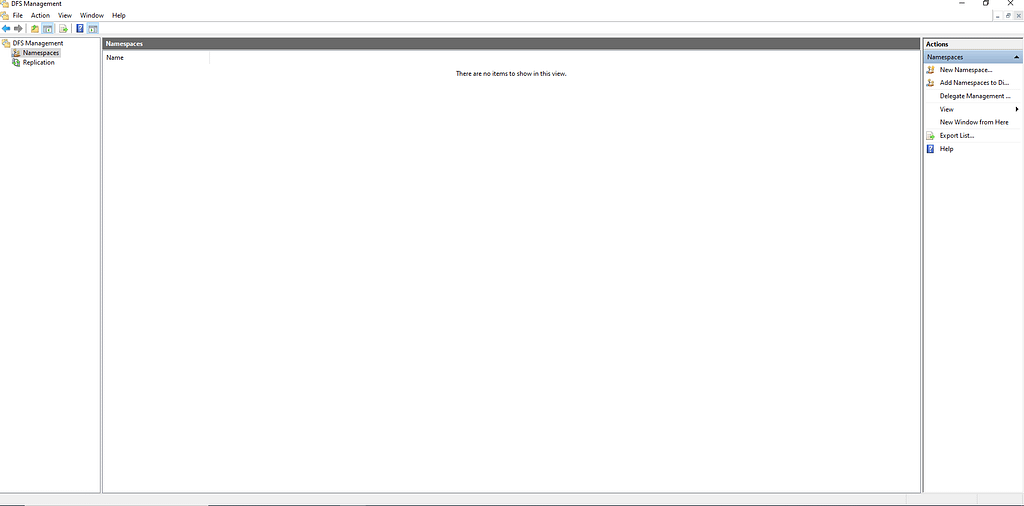
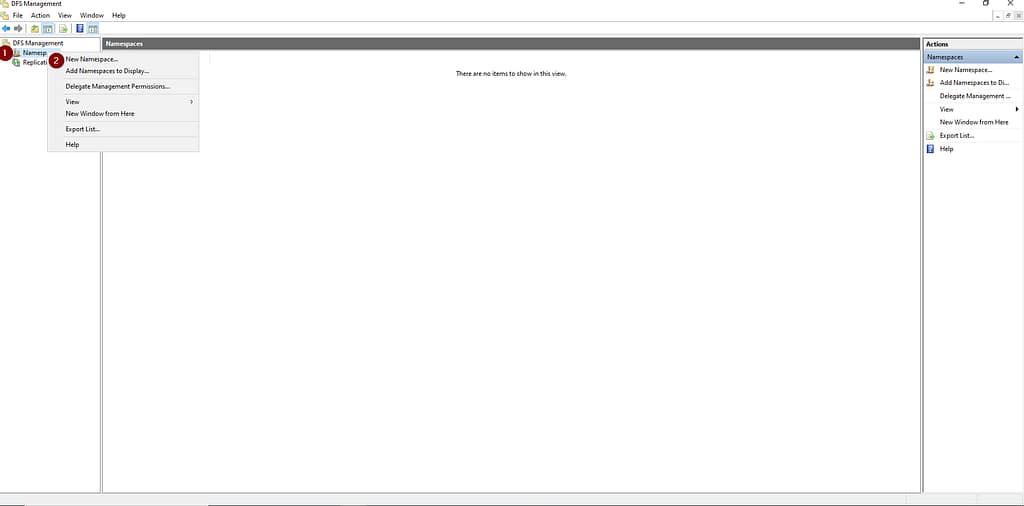
Then right-click New Namespace on the left side
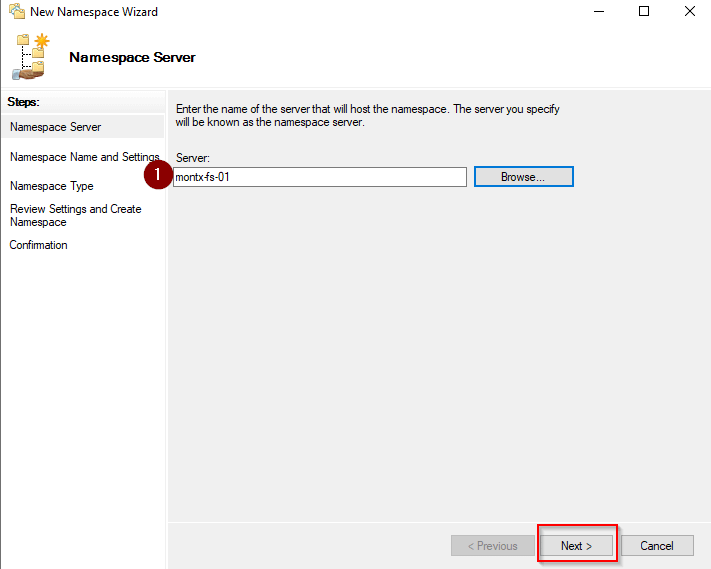
The first step in the wizard that opens is to indicate the name of the server on which the folder is to be configured, in this case montx-fs-01.
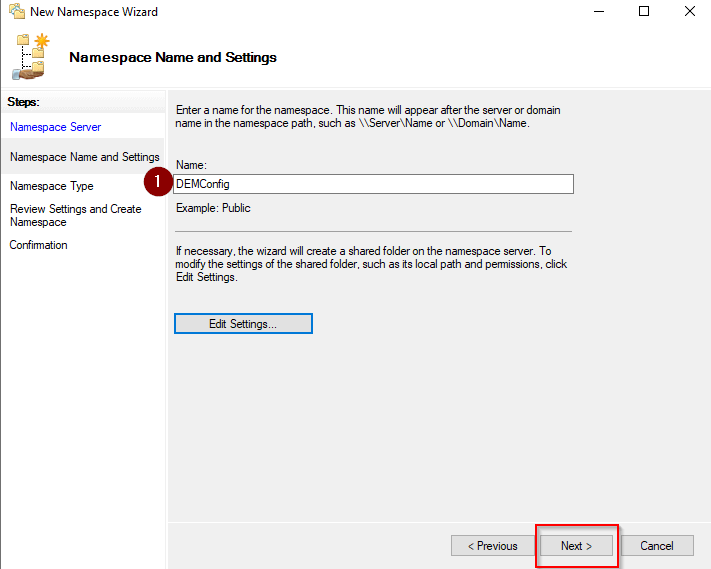
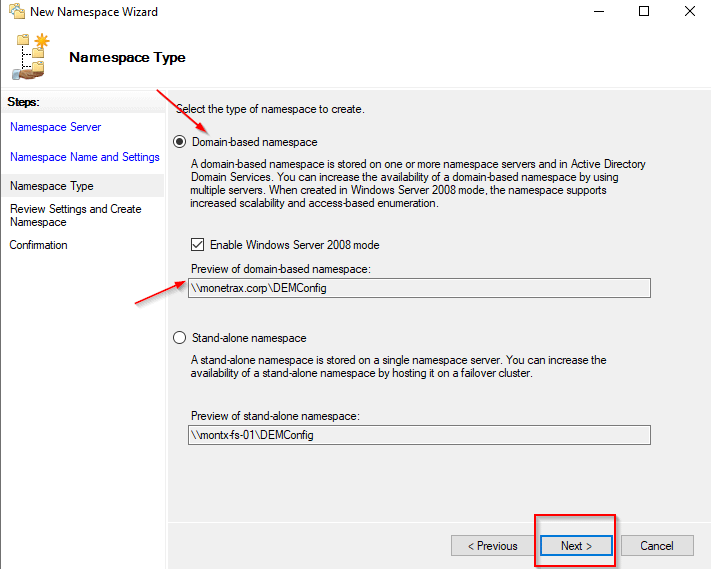
Next, enter the name of the DEMConfig folder and select Next
Leave the option to use the domain name in the path
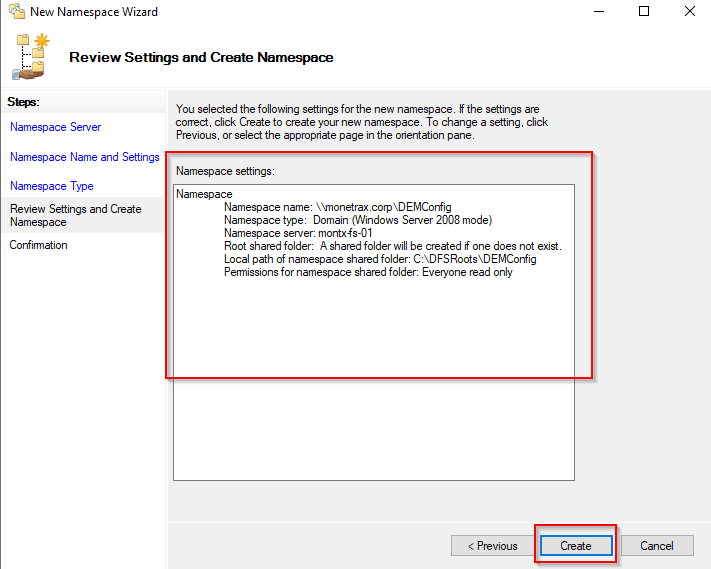
At the end, the wizard displays a summary, if everything agrees select Create
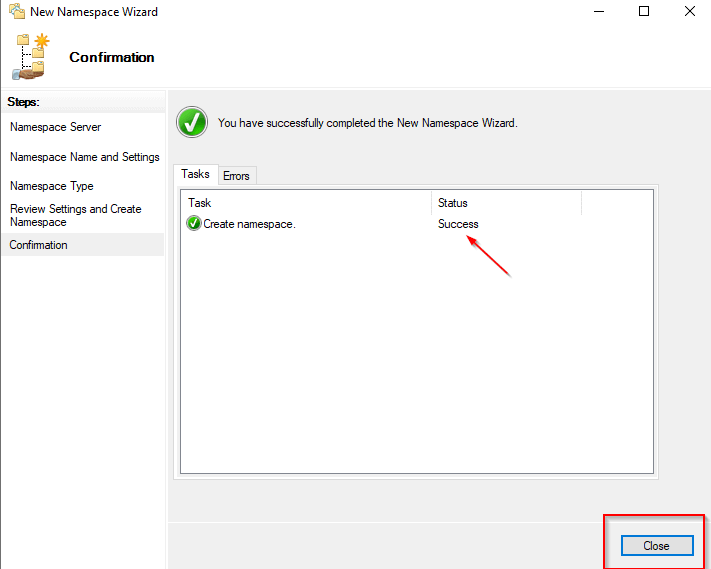
After a while, the folder will be created
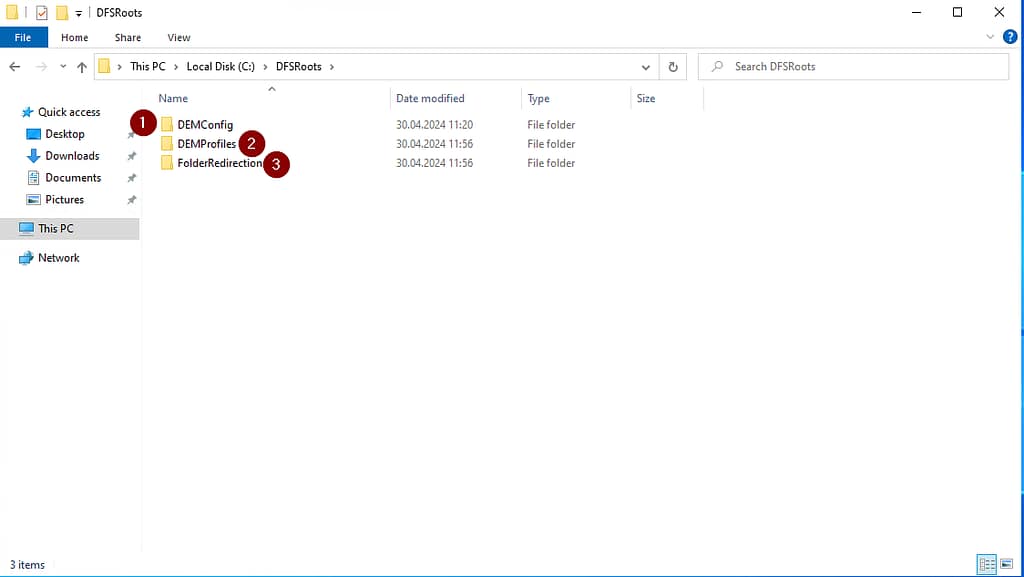
Repeat this process for folders named DEMProfiles and FolderRedirection.
Once the folders have been created, you should see three folders in the c:DEMSRoot location
NTFS and share permissions
The next step is to assign the appropriate NTFS permissions to the folders:
- DEMConfig
- Horizon Admins = Full Control
- Horizon Users = Read
- Domain Computers = Read
- DEMProfiles
- Horizon Admins = Full Control
- Horizon Users = Read/Execute, Create Folders – this folder only
- Creator Owner = Full Control
- FolderRedirection
- Admins = Full Control
- Domain Users = Read/Execute, Create Folders – this folder only
- Creator Owner = Full Control
To grant permissions, right-click on the folder and select Properties, then Security tab, then Advanced, finally Change permissions.
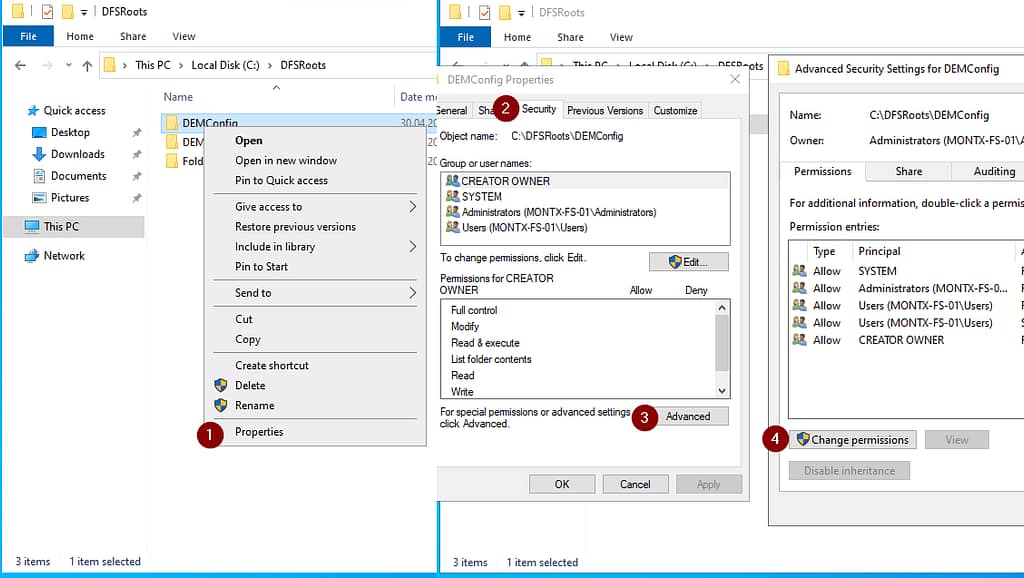
The next step is to disable inheritance of permissions from the parent folder, by selecting Disable inheritance
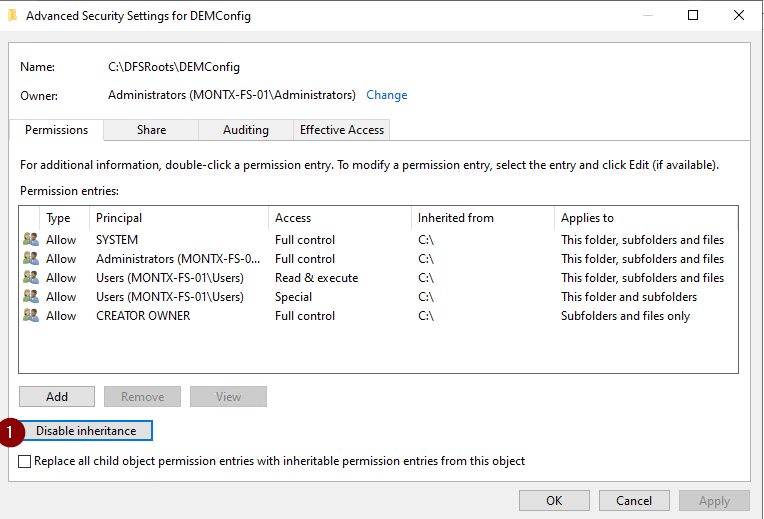
Two options will be displayed, select Remove all inherited permissions from this object
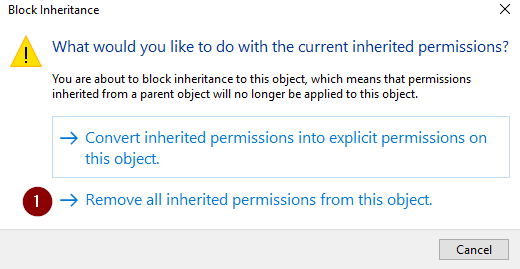
All permissions will be removed
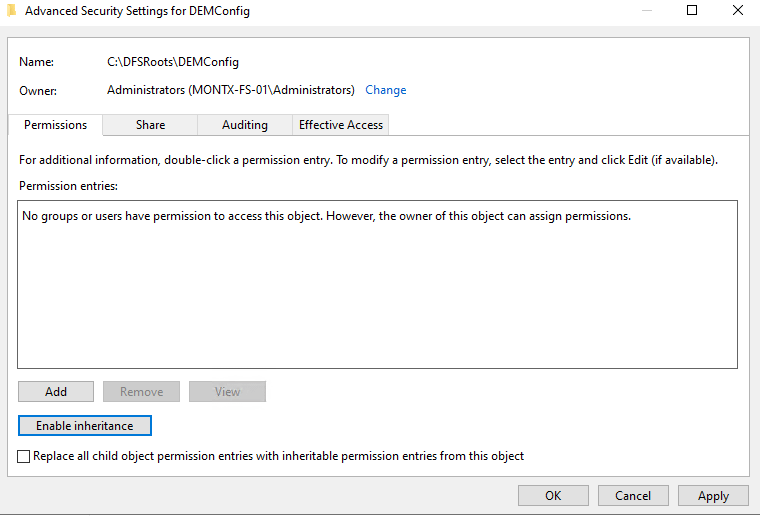
Add permissions for individual groups as above, and also add Domain Admins with Full control permissions.
To assign permissions, select Add, then select principal, indicate the group, select the appropriate permissions and confirm.
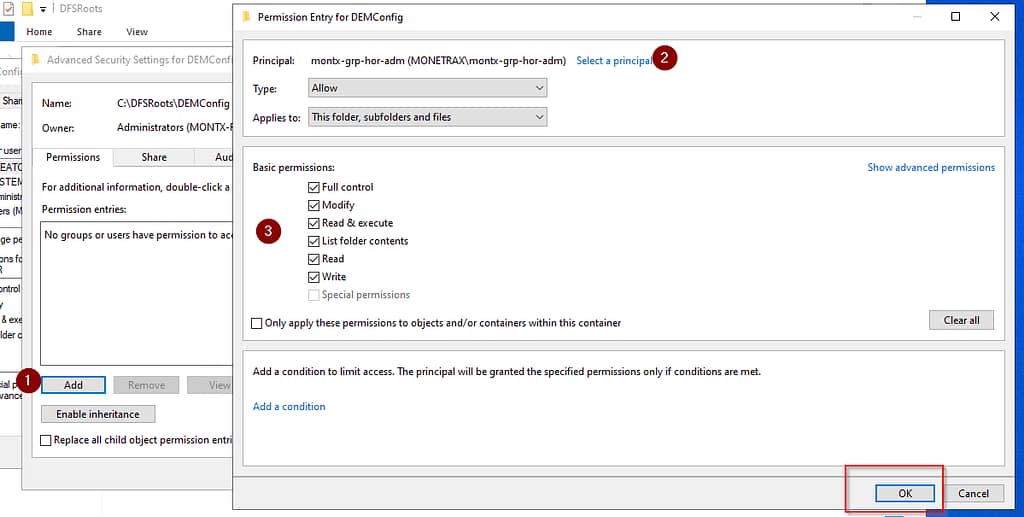
Assign permissions should be repeated for all groups indicated above and folders.
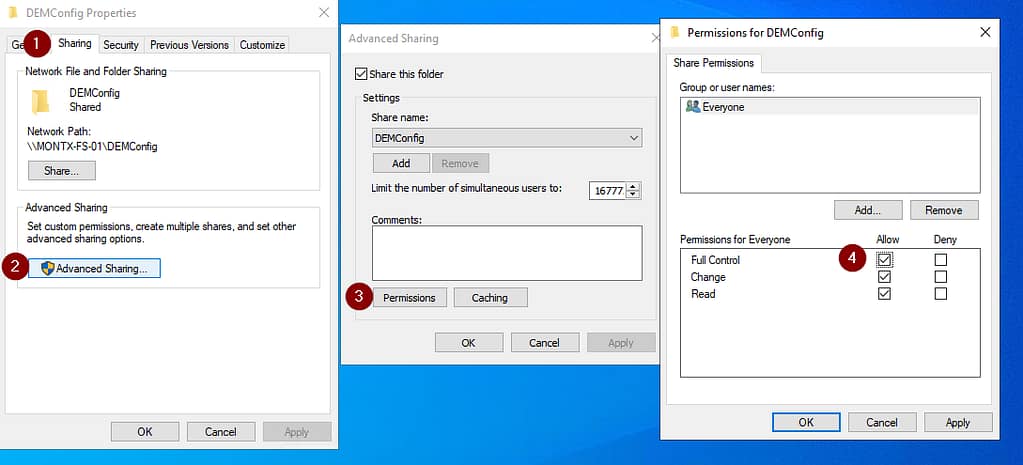
You still need to set permissions for the shared folder, in the sharing tab, go to Advanced Sharing and select Permissons, give Full control permissions for Everyone
Installing the DEM administrative templates
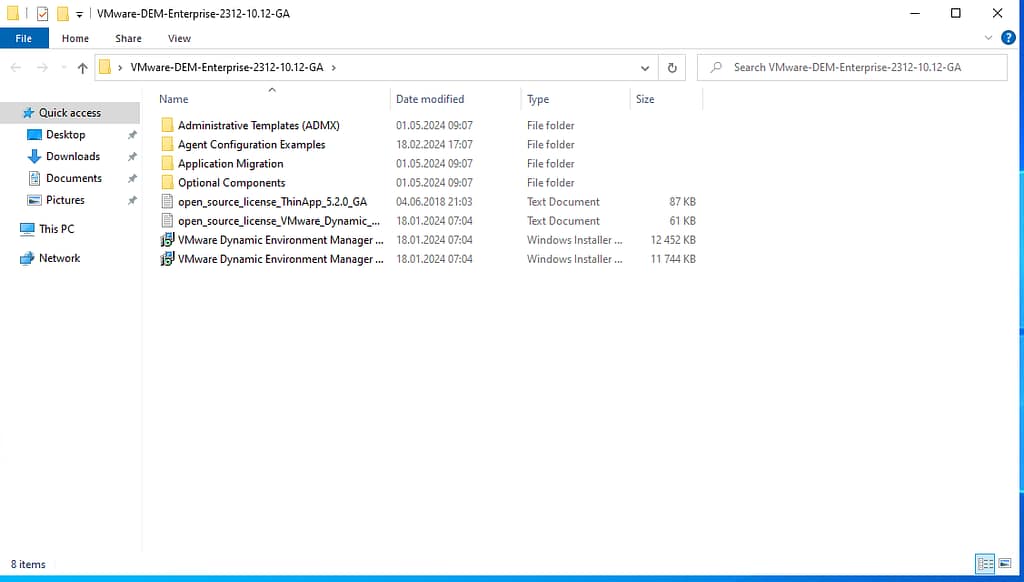
The files are provided as a zip archive, unzip them
GPO configuration
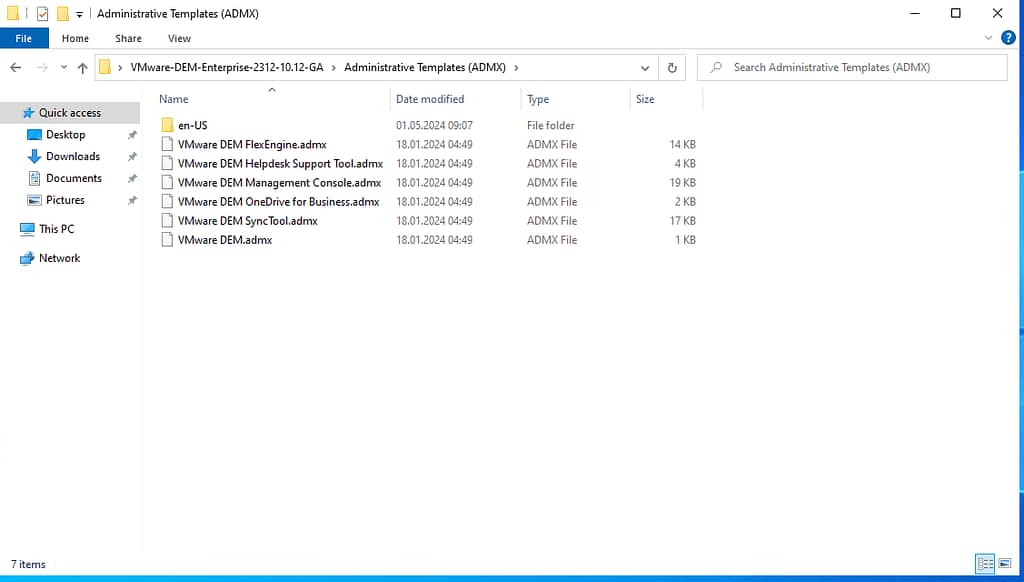
At the beginning of the configuration, copy the admx and adml files to the SYSVOL\
To configure policies, run the Group Policy Management attachment
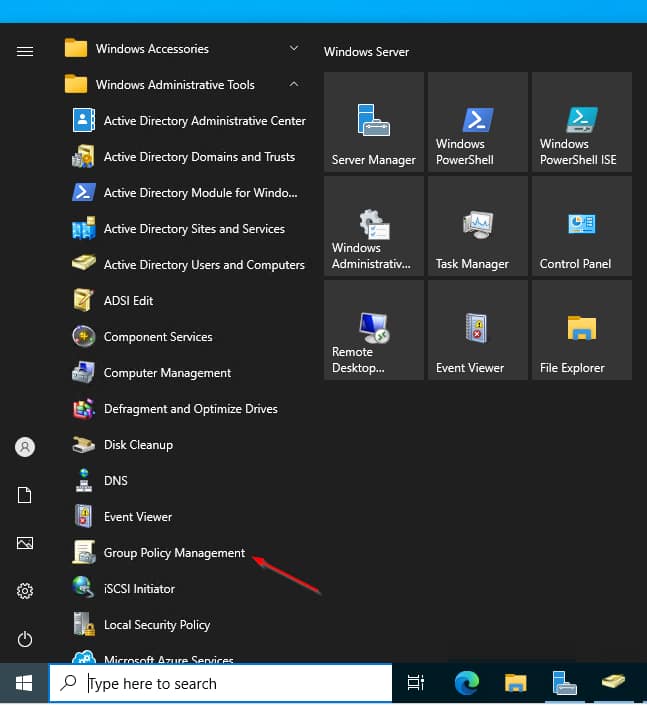
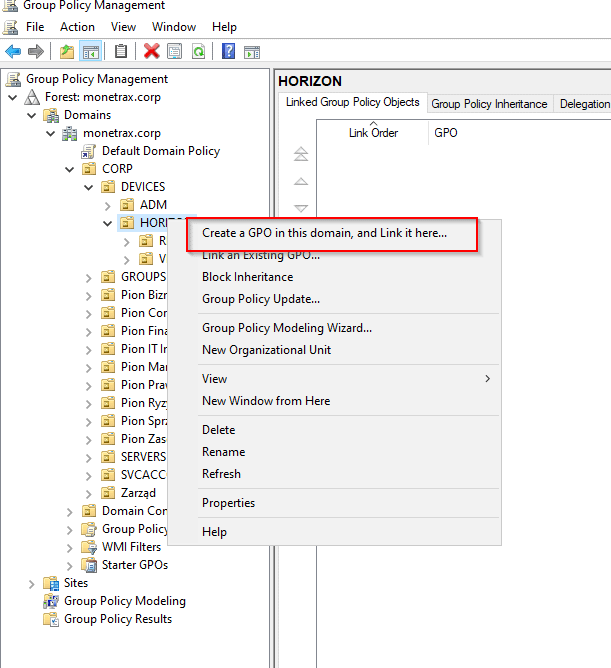
In the next step, you need to prepare a configuration policy for the DEM agent, to do this, select OU and from the context menu select Create a GPO in this domain, and link it here
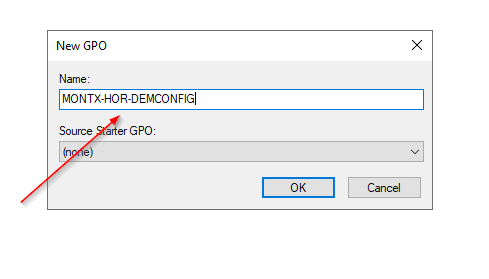
You will be prompted to enter the name of the policy, in this case it will be MONTX-HOR-DEMCONFIG, confirm ok
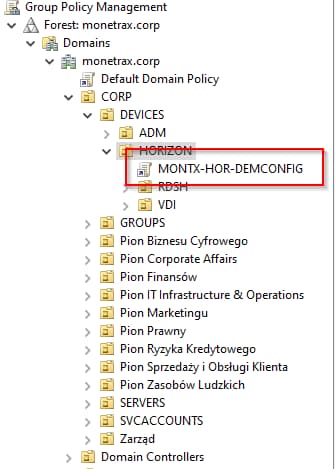
Once the policy is created, it will be visible under the given OU
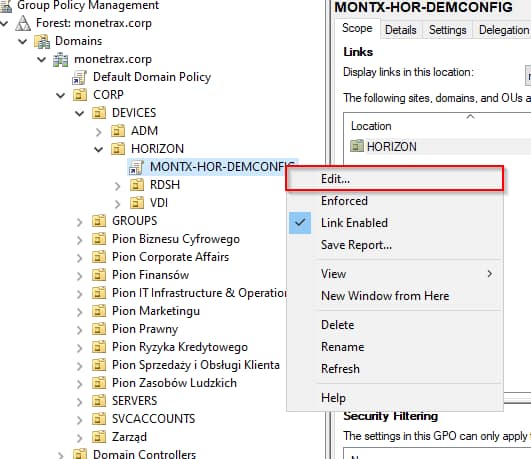
To configure the given policy, select Edit from the context menu
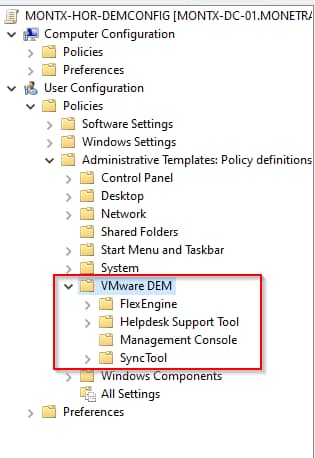
If the administrative templates have been loaded correctly in the User Configuration -> Administrative Templates branch, a folder with Vmware DEM settings will appear
Configuring the DEM agent through GPO
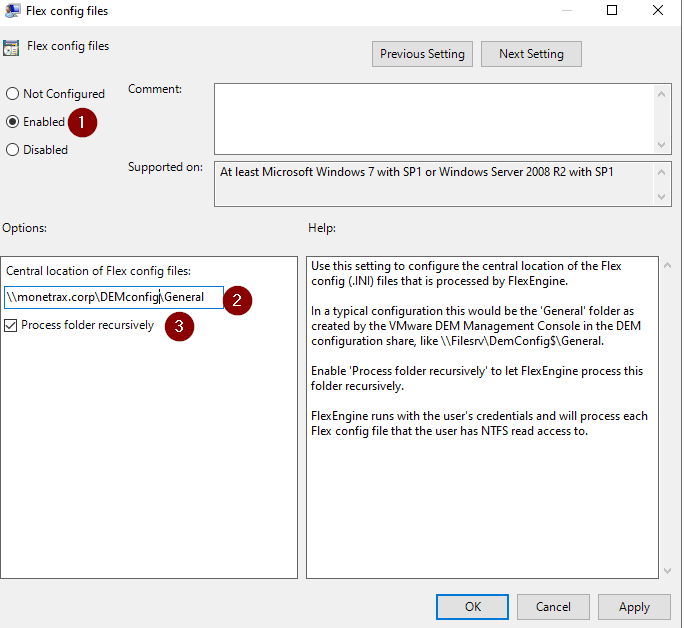
The first option you need to configure is Flex config files, you should indicate there the path where the DEM configuration is stored in the form of UNC path \nmonetrax .corp\nDEMconfig\nGeneral, you should also check recursive search.
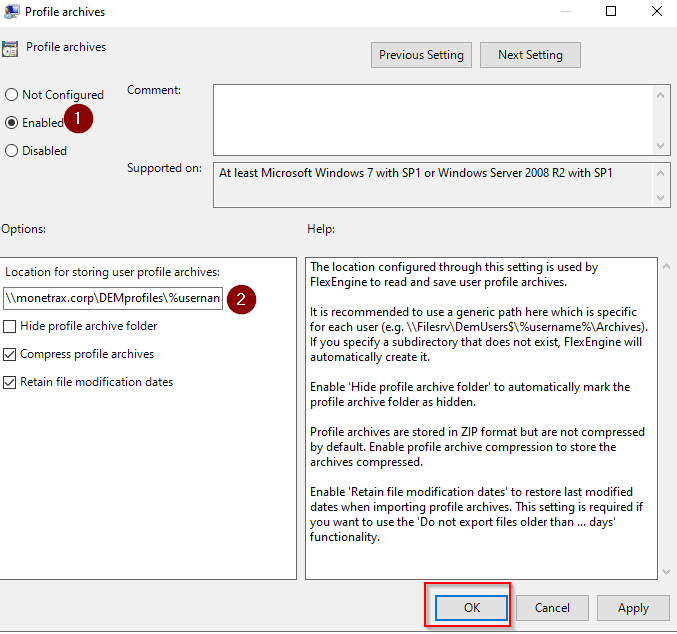
The next option for configuration is called Profile archives, this path will store the captured user settings while the user is working. The settings will be kept in zip files. The path ƒmonetrax .corpƒDEMprofiles%username%Archives will be created based on the user’s name, thanks to the Windows system variable %username%.
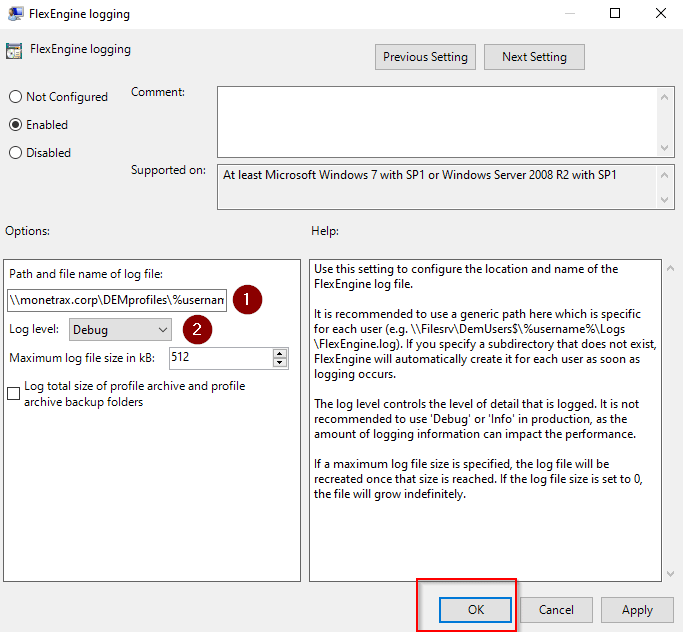
DEM agent event logging still needs to be set up, this can be done using the FlexEngine logging option. The path for the logs will be \monetrax .corpDEMprofiles%username%Logs, the log level is set to Debug, so that all events will be saved if analysis is needed.
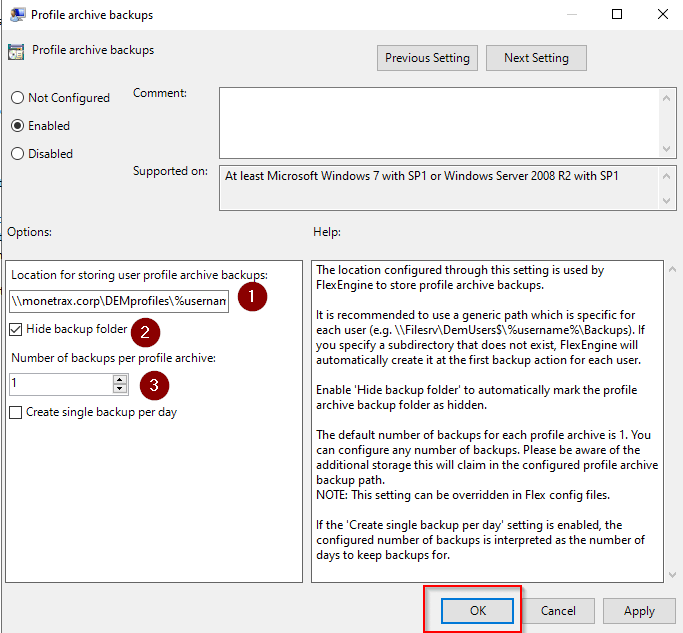
The last thing is to set profile backups, this is an option called Profile archive backups. The place to store these files will be the location of ƒmonetrax .corpƒDEMprofiles%username%Backups, the number of backups will be 1, and the backup folder will be hidden.
Installing the DEM management console
After the GPO configuration is complete, install the DEM management console, this can be done on any station, preferably it should be an administrator station.
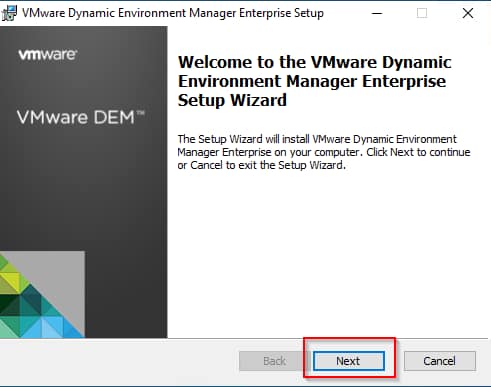
Run the file VMware Dynamic Environment Manager Enterprise 2312 10.12 x64.exe , the installation window will appear. At the beginning, select Next.
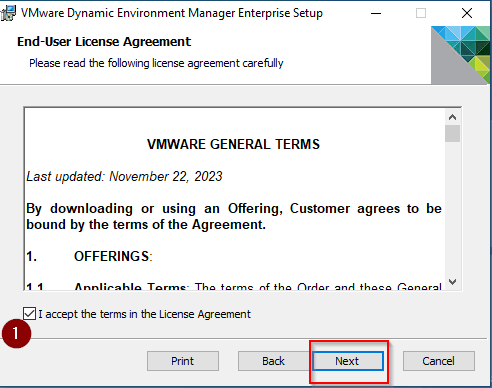
Approve the provisions of the license agreement
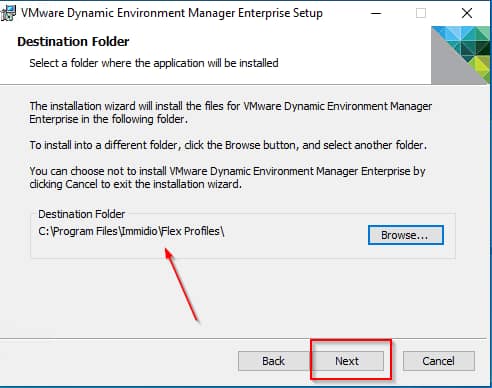
Leave the default installation path
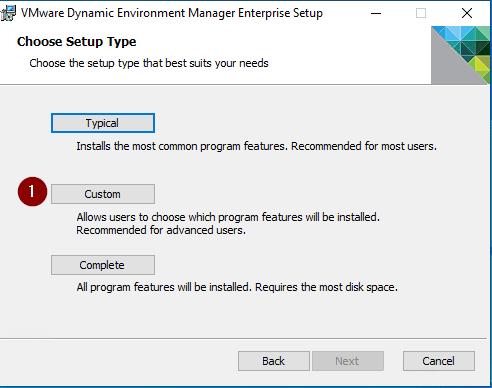
Select Custom installation type
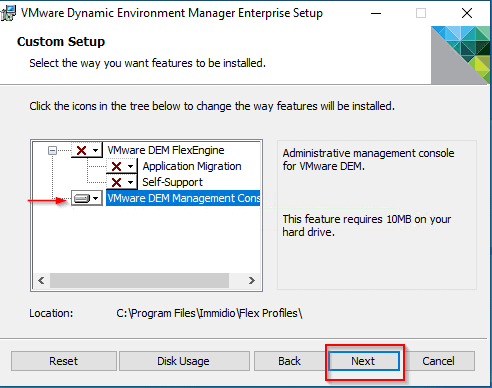
Select Vmware DEM Management Console for installation, the other options are not needed during this installation.
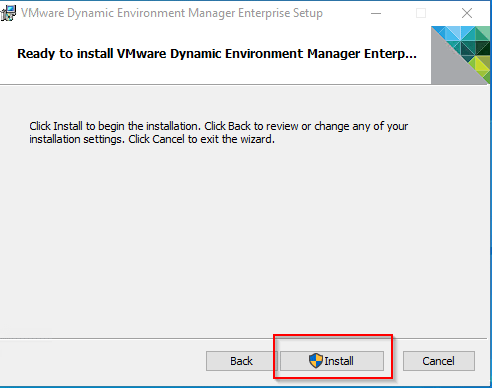
Confirm the installation by Install
Complete the installation process by selecting Finish
First launch of the console
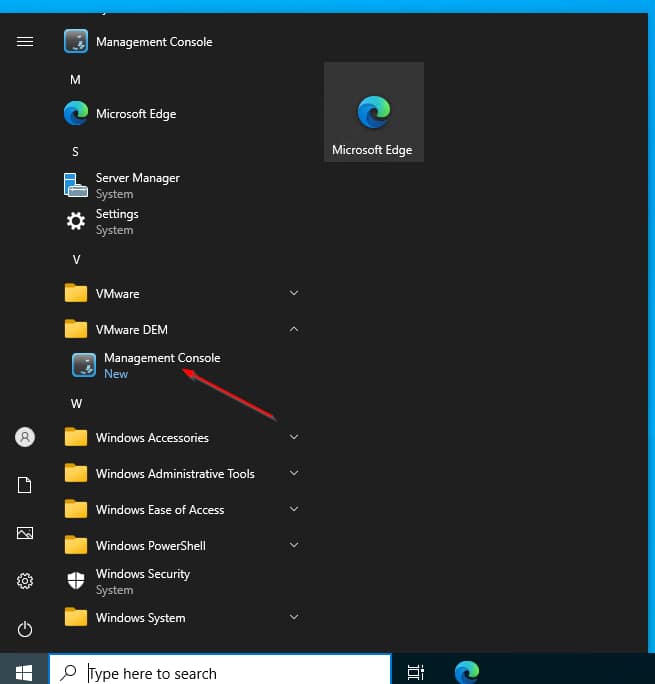
After the installation for configuration, run the Managment Console application
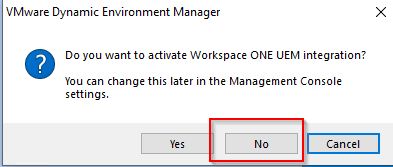
The first time you run the console you will be asked if you want to integrate with Workspace ONE UEM, at this point select No
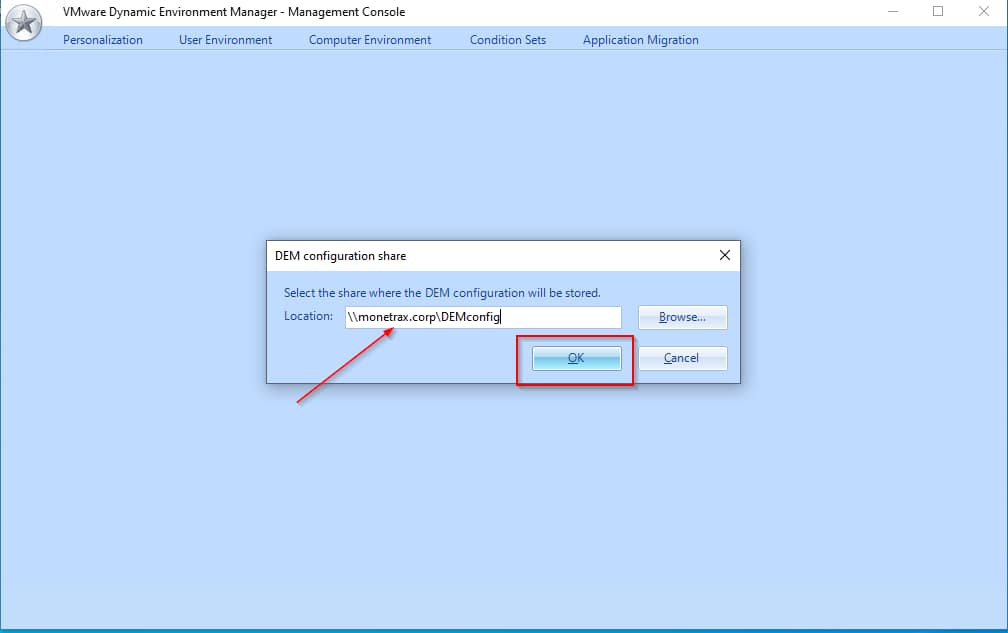
At the first launch, indicate where the configuration will be stored, this will be the previously prepared path \monetrax .corp\DEMconfig
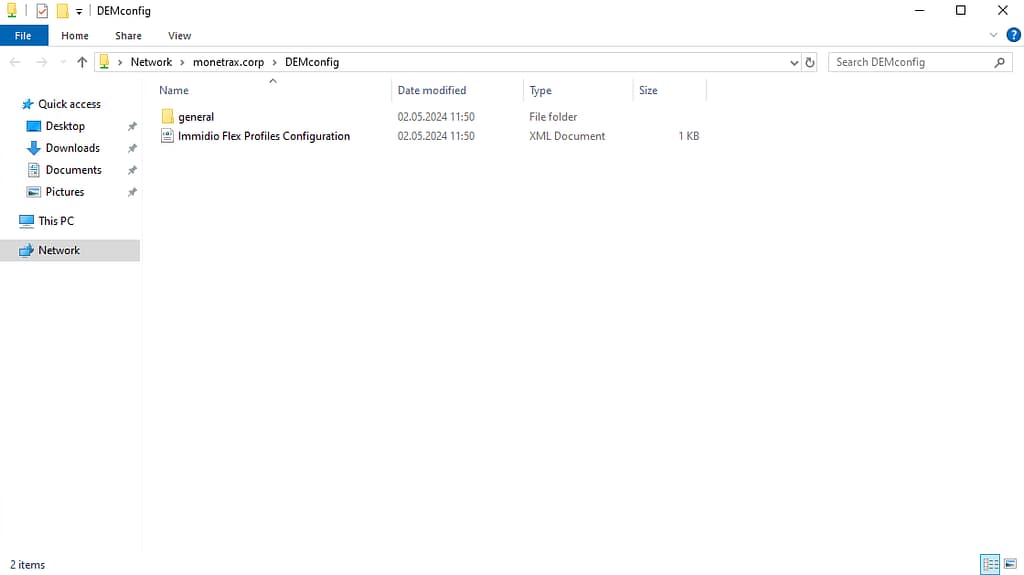
A general folder will be created automatically in the indicated location
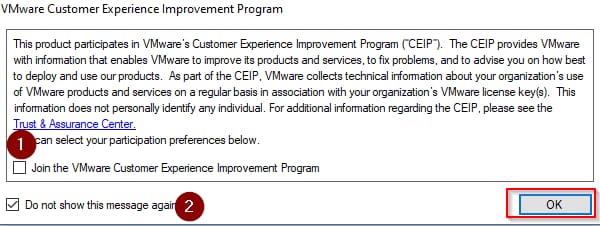
Deselect the Join the Vmware Customer Experience Improvement Program option, and check the Do not show this message again option
Application configuration templates
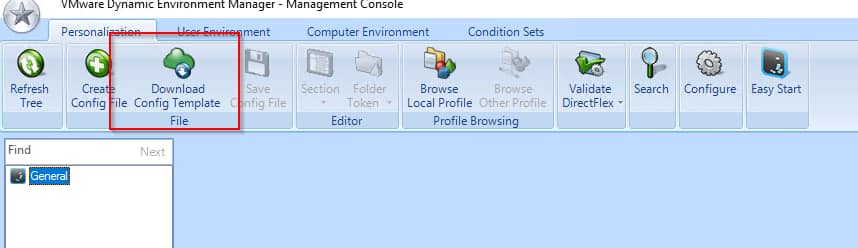
After launching the console, download the application setup templates, this can be done using Download Config Templates.
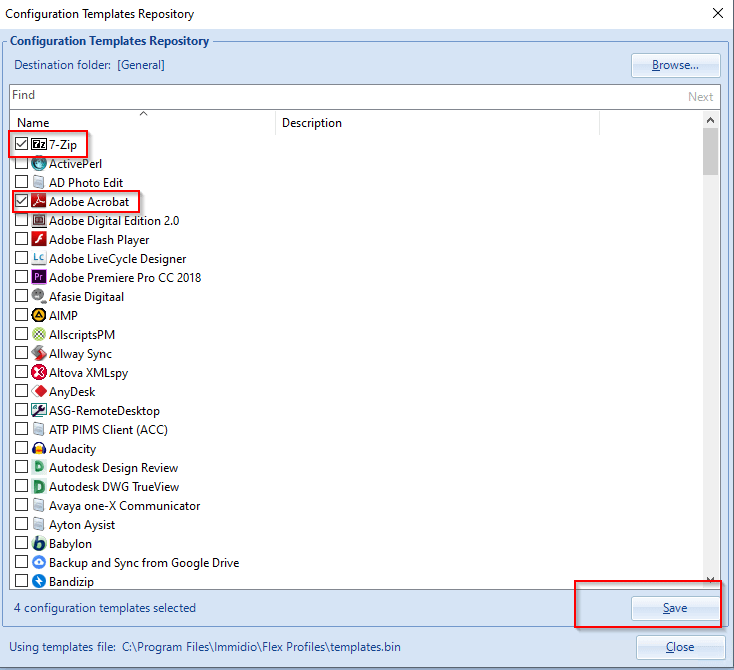
Then select the applications of interest, confirm by selecting Save, and then close the selection window by Close
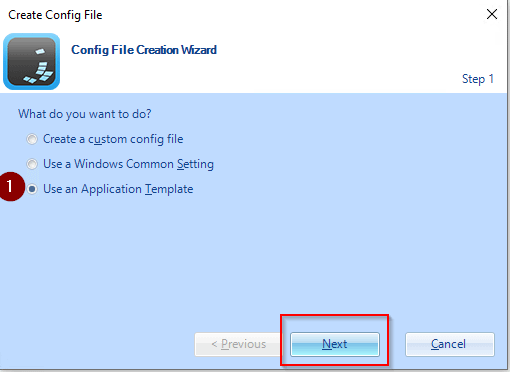
If Office settings are to be captured, add them using Create Config File

In the wizard, select Use an Application Template
Select Microsoft Office 2016/2019/365 from the list
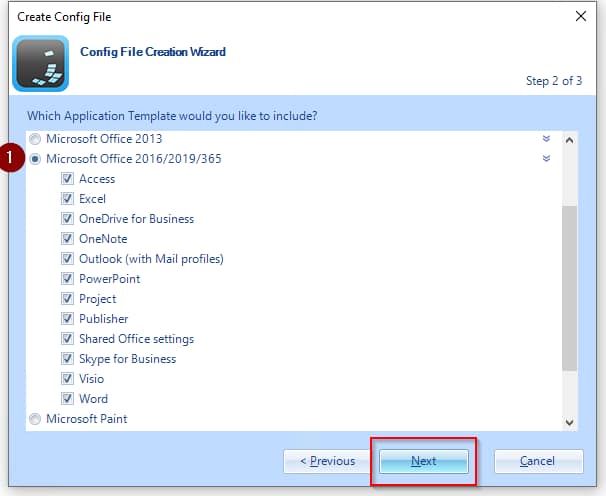
In the last step, give a name to the settings, e.g. Microsoft Office, confirm Finish
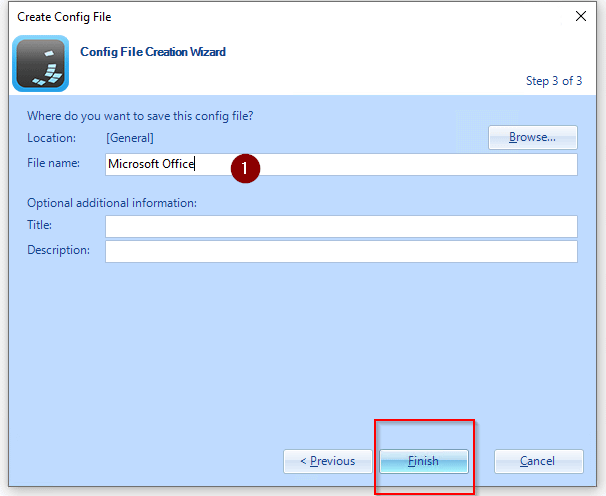
You can use the following options in the application settings capture configuration:
| Option | Description |
| IncludeFolderTrees | Includes files and subfolders in the specified folder. |
| ExcludeFolderTrees | Excludes files and subfolders in a specified folder. |
| IncludeIndividualFolders | Includes only files in the specified folder. |
| ExcludeIndividualFolders | Excludes only files in the specified folder. |
| IncludeFiles | Includes the specified file or, if the file name contains wildcards, files. |
| IncludeFilesRecursively | Includes files in a folder and subfolders if they match the specified file name or pattern. |
| ExcludeFiles | Excludes the specified file or, if the file name contains wildcards, files. |
| IncludeRegistryTrees | Includes values and subkeys of the specified key. |
| ExcludeRegistryTrees | Excludes values and subkeys of the specified key. |
| IncludeIndividualRegistryKeys | Includes only the values of the specified key. |
| ExcludeIndividualRegistryKeys | Excludes only the values of the specified key. All subkeys of the specified key and their values are not excluded. |
| IncludeIndividualRegistryValues | Includes the specified value. |
| ExcludeIndividualRegistryValues | Excludes the specified value. |
Example configuration using selected values for Chrome
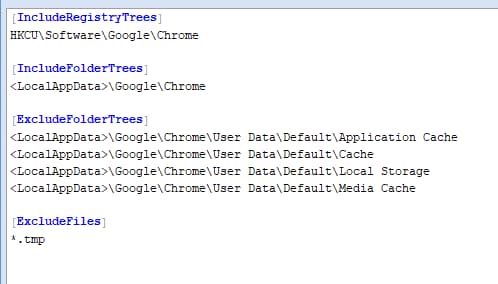
For folders, you can use the following tokens, which are references to folders in Windows:
(the equivalent of the %APPDATA% folder in Windows), , , , (the equivalent of the %LOCALAPPDATA% folder in Windows), , (the user’s documents folder), , , , , , (the Startup folder in the user’s start menu), (the equivalent of the %USERPROFILE% folder in Windows).
User folder redirection
As a final step in the initial configuration of the DEM, redirect the user settings to the previously prepared location
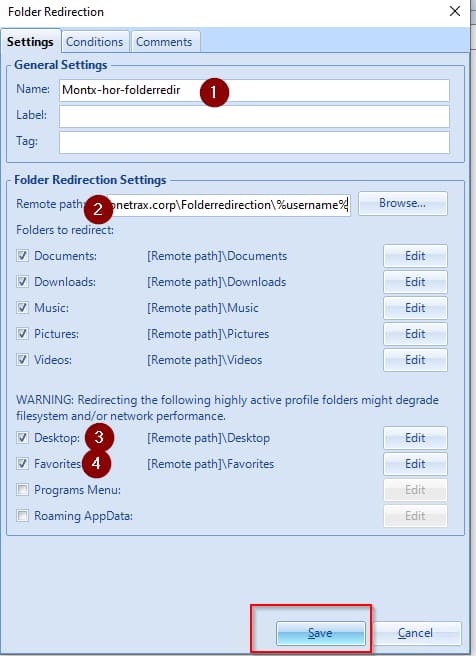
To do this, go to the User Envirnoment tab , go to Folder Redirection, select Create Folder Redirection settings from the context menu.
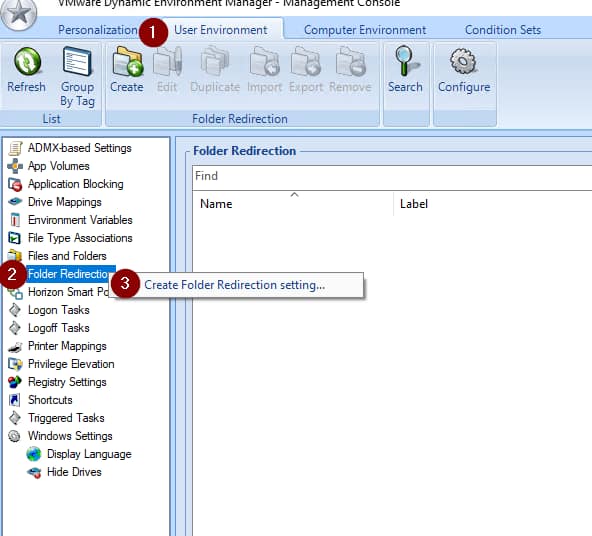
In the window, enter the name of this setting, and provide the path with the username variable \monetrax .corp\Folderredirection%username%, add Desktop and Favorites to the selected folders.
The initial configuration of the DEM is now complete.
The full series
- Part 1 – Preparing the organisation for the deployment
- Part 2 – Installing VMware Horizon
- Part 3 – Windows 10 golden image and publishing a VDI pool
- Dynamic Environment Manager configuration — you are reading this
Leave a Reply